Raster drawing TELE-style body

An avid amateur guitar maker prefers to draw shapes directly on the wood from which they want to build the guitar body. A less hurried craftsman begins to sketch on cardboard or MDF board. However, both soon discover that not all details are perfect the first time and that errors have to be continuously adjusted and corrected before the result is correct. Corrections on paper or on a PC monitor are easier and faster. So we take a sheet of paper measuring 55 x 45 centimeters and fix it on a drawing board or a suitable solid and smooth plate.
Then we draw a frame of 500 x 400 millimeters (from now on we will "professionally" measure in millimeters). Now we divide the inner surface with lines into 20 square tiles 100 x 100 mm. The numbering of these t i l e s facilitates the orientation and allocation of the individual parts as well as the comparisons with other guitar types.
We mark the z e r o p o i n t in the middle between tiles no. 1, 2. 3 and 4. We highlight the horizontal X-axis and the vertical Y-axis (scale line) in color or a little thicker.
Zigzag outline
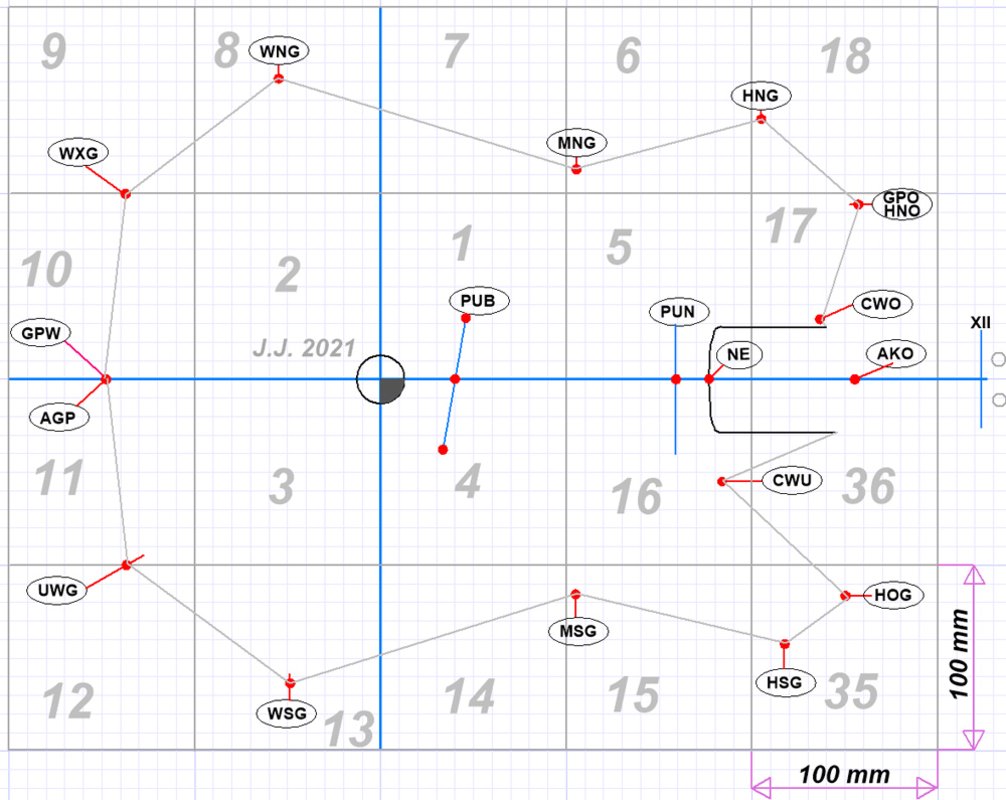
The X and Y positions of the control points (CP), starting from AGP to CWO, can be found above in the table "Specifications Type" T".
With the help of a ruler or a caliper, we mark them in the corresponding tiles and connect them to clarity with thin lines. The resulting outline is not very similar to the contour of the original, but we can immediately see that the basic proportions are there.
Almost smooth outline
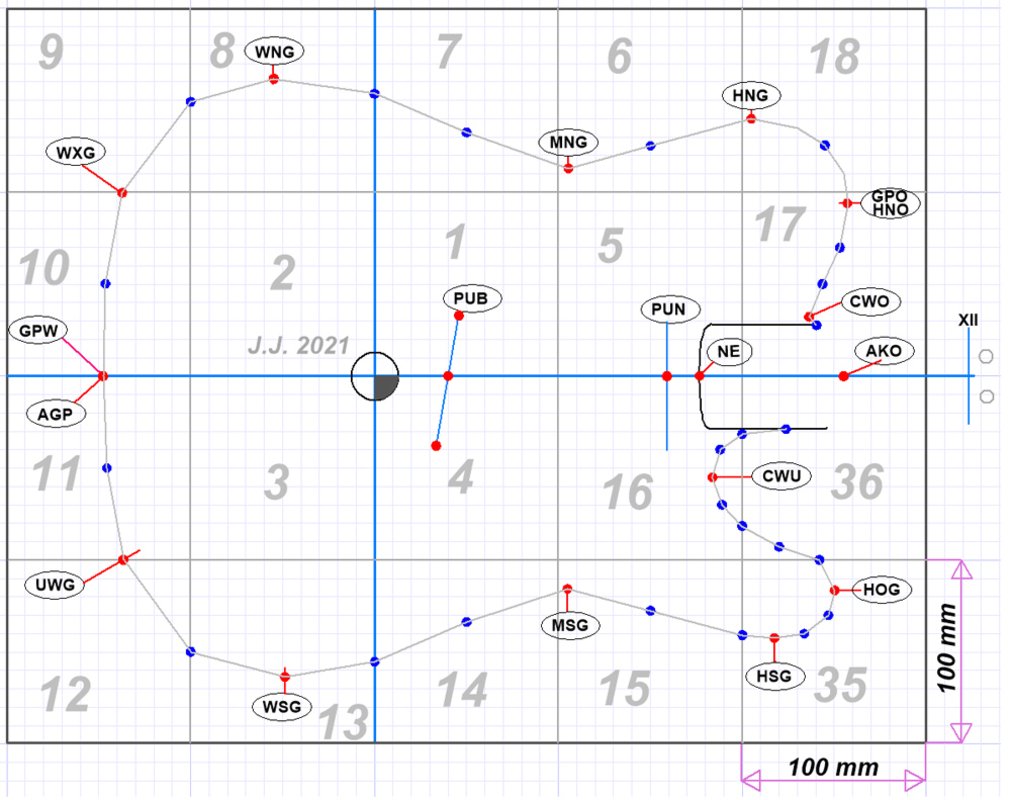
Before we start rounding off the contour, we measure the coordinates of the intermediate positions in the template drawing and enter them into the tile. In total we have 37 points on the outline, and once connected, the shape is very close to the familiar Telecaster shape. With the help of a curve ruler (or on a monitor with a Beziere curve) we can easily smooth the final shape. And the outline is ready. The next step is to draw the internal cavities, namely:
<> Neck pocket
<> Electronics cavity
<> Pickup cavities
Smooth outline
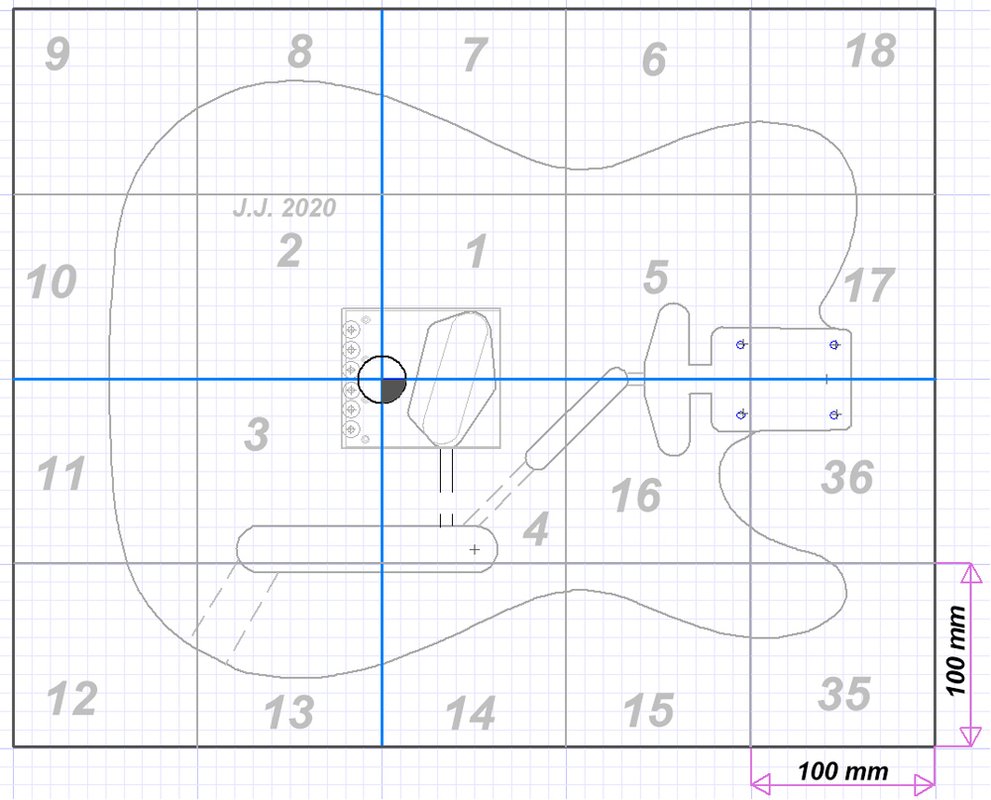
The width, length and depth of the neck pocket are of course to be adapted to the existing neck.
Bridge placement - problem?
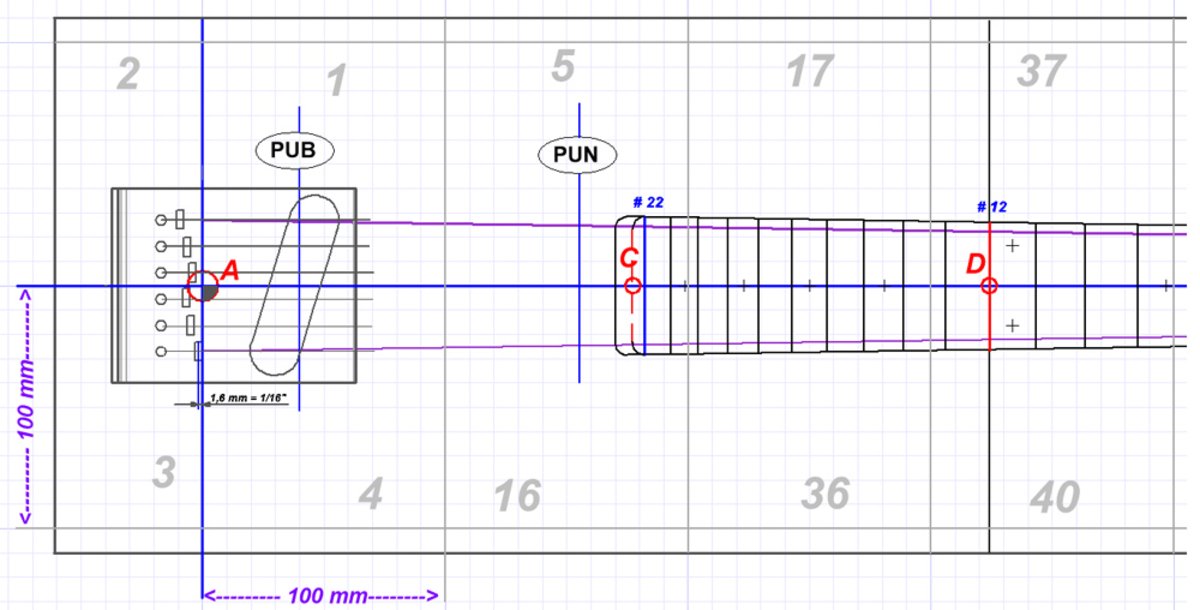
The standard Telecaster bridge enables intonation (compensation) in the range of 20 mm. When using Jaguar or TOM Bridge, this area is much narrower.
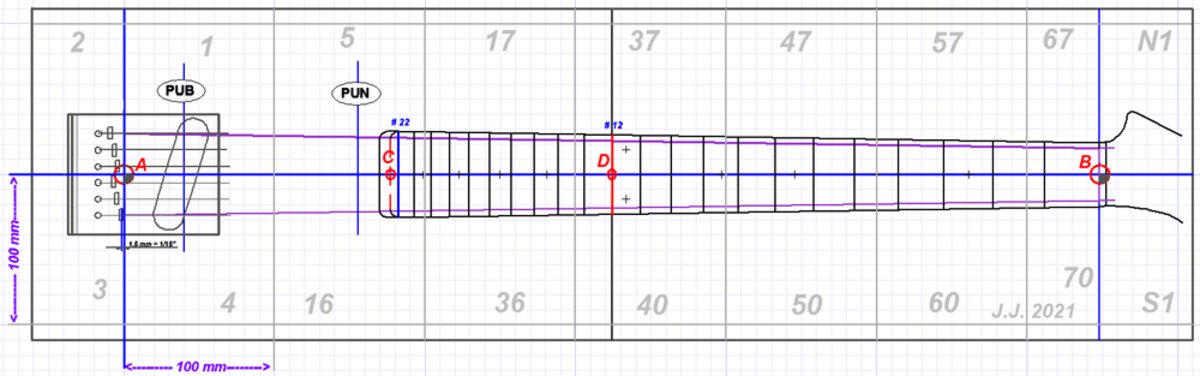
We know that the saddles of each of the six strings on the bridge are a certain amount (so-called compensation) further away from the vertical scale line (i.e. intersects the zero point A).
The shortest compensation will need the thinnest string e1 and the longest compensation will need the string E6.
We also know that the length of the sounding part of the string, between the nut and the rest on the bridge, is never shorter than the specified scale length. In other words:
The compensation never shortens the length of the scale length. The scale length is defined as twice the distance between the front edge of the nut and the crown of the twelfth fret. So between points B - D.
If you don't have to remind yourself of these connections again, screw the rider for the thin string e1 so far that the screw at the front only protrudes by a "hair". And the whole bar is placed according to the picture.
With other strings, the screws stick out more after the intonation (compensation), the longest with string E6.
Pickguard

An area of 40 x 30 cm is sufficient for drawing the pickguard in its original size on paper, cardboard or a white HDF board.
Comments (0)
No comments found!