Core Area
I have defined the core, i.e. the area of the sounding strings, in order to separate the physical relationships from the ergonomic and aesthetic point of view. In the case of guitars and related instruments, many parts and details are identical or very similar despite the variety of models. Often the difference lies in the dimensions, but not in the proportions.
Professional luthiers work according to different templates for the individual parts. You have enough theoretical and practical experience to know how it all fits together. For amateur beginners, in addition to various drawing templates, there is a handy tool for self-construction - the STARTING template. This is a core construction plan, not on paper, but on a hard, 3 mm thick, white HDF board. Its purpose is to clearly show the cohesion of individual assemblies and parts and to be able to directly scan or mark all corner, support and control points.
Creating the STARTING template shows both beginners and advanced learners where to be careful to avoid mistakes later. It is recommended to make additional STARTING templates with different standard scale lengths for later projects. The creation of the templates on a scale of 1: 1 can be compared with the dress rehearsal before the premiere. Unevenness can be "ironed out" and errors corrected and when you put together all the partial templates you can see how precisely and cleanly you have worked. Another positive thing is that the stencil material is relatively cheap. The digital way of working on the PC is in principle comparable, only instead of templates, one creates data tables for CNC.
The drawing of STARTing template
Creating a STARTing template helps beginners and advanced users alike, where to look out for later mistakes. For later projects, it is recommended to create additional STARTing templates with different standard scale lengths. We do not have to draw the positions of the frets, because a calibrated template or a precise metal ruler must be used to position them precisely when cutting the grooves in the fingerboard. And, of course, a reliably verified table of the positions of the relevant scale length with an accuracy of hundreds of millimeters.
Creating templates in a 1:1 scale can be compared to the dress rehearsal before the premiere. Inequalities can still be "ironed" in time and errors corrected, and after assembling all the sub-templates, we can see how accurately and carefully we worked. Another positive thing is that the HDF or MDF template material is relatively inexpensive. The digital way of working on a PC is basically comparable, only instead of templates we create data tables for CNC.
A C D B the most important measuring points
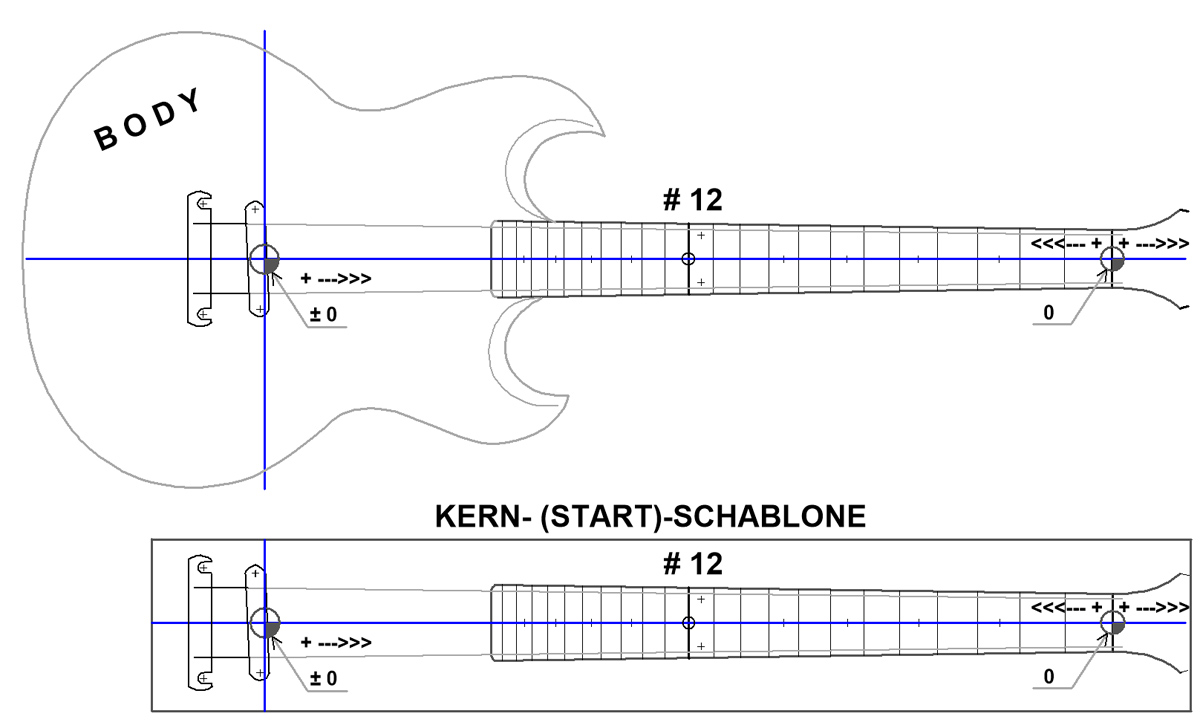
Creating a STARTING template
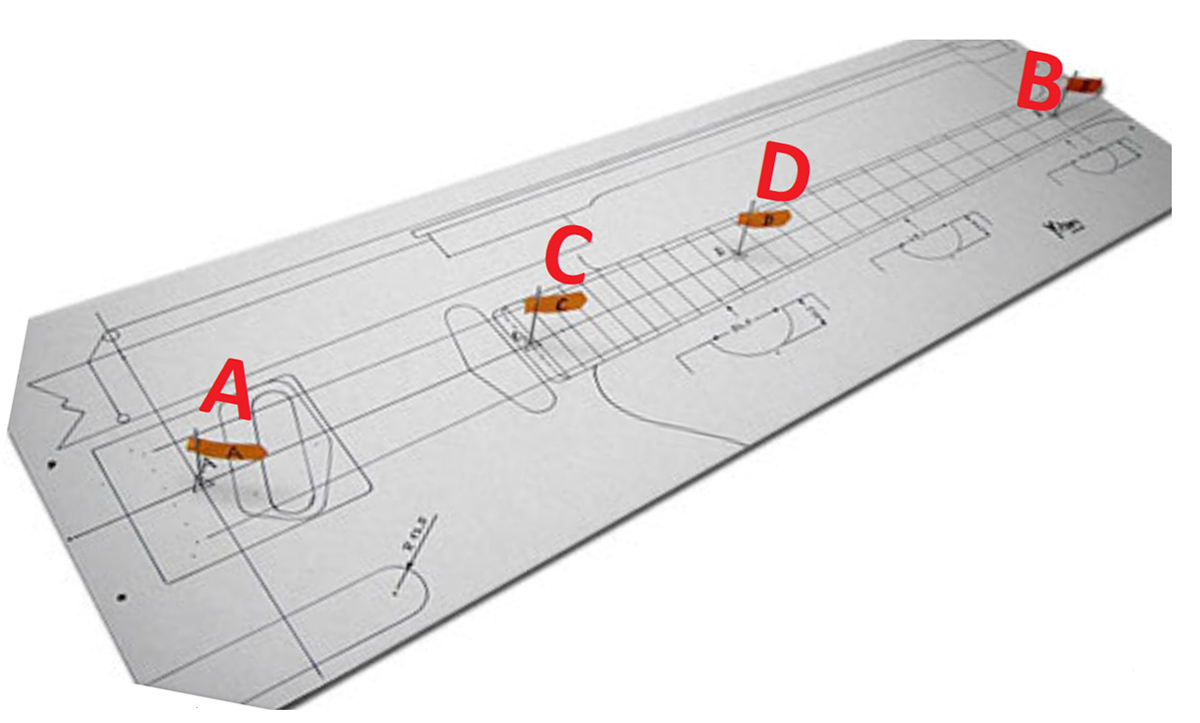
The most important measuring points are on the center line:
A - the ZERO POINT, lies exactly at the intersection of the center line and the scale line,
B - marks the position of the nut, more precisely the nut front edge (or center of the crown of the zero fret),
C - lies on the center line where the neck ends and the neck pocket begins. Warning: the fingerboard can be longer than the neck!
D - halves the scale length and corresponds to the 12th fret (octave)
The introduction of new methods tends to cause skeptics to express concerns, distrust and reluctance. For example, in this comment from a forum:
F.M. “... the background for the production of a so-called "starting template" when recreating an instrument remains a mystery to me if there are already construction plans. Instead of scaling errors when printing, you have your own measurement errors when you draw yourself .... "
My arguments for a STARTING template:
- One learns best through one's own measurement errors and one does not remove any existing and noted foreign errors.
- The one STARTING template is created only once for each respective length.
The advantages of the STARTING templates are:
- - The robust HDF board is more suitable than a paper plan for work in the workshop,
- - can be stored, put down and stacked in every corner (to save space)
- - contains only the most important things, encourages you to be creative,
- - the neck-body fit is described exactly,
- - universal for the respective length,
- - Compatible with CAD, CNC thanks to coordinate representation,
- - You don't need your own printer, plotter or a trip to the copy shop.
After all, the ardent critics have stopped talking badly about my method of coordinate measurement. It is only partially ignored or at best tolerated. On the other hand, I am more and more happy to receive inquiries as to whether I could explain or add to some coordinates.
Comments (0)
No comments found!