Guitar contours
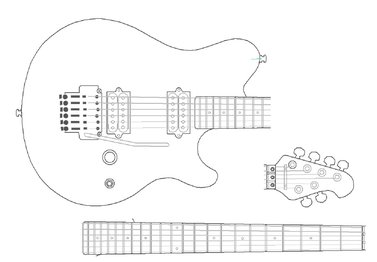
The three parts of the electric guitar (body-neck-head) differ in their size and shape. It makes sense to look at and evaluate each part individually.
The separate representation of the body may seem strange instead of an overall blueprint, but it has some advantages. First of all, you can quickly look up all the dimensions you are looking for without having to roll out or unfold large-scale drawings for a small detail.
The outlines of millings, cavities or recesses for covers can also be easily defined in coordinates. The outlines of the pickguards and similar decorative parts could be measured and compared separately from the body if the origin is the same zero point from the body.
Contour capture

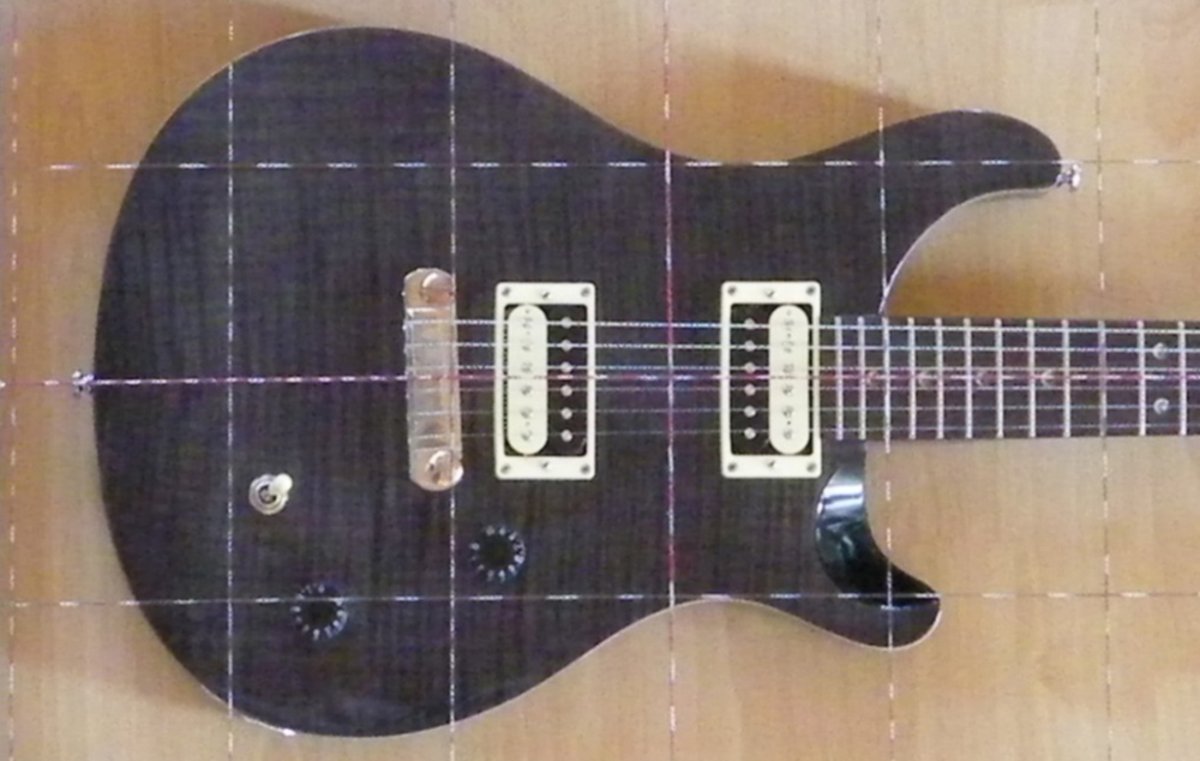
The easiest way to translate the outline of a guitar onto the coordinate system is to drag the body around with a pencil. For this purpose, a device is recommended, or provisionally to be drawn around with a pencil cut lengthways and held vertically
Then we draw the longitudinal axis (symmetry) through the body center to the outline. The vertical Y-axis intersects the X-axis at a point that we measure from the edge of the body (belt pin AGP or GPW).
For this intersection of axes, called ZERO POINT, we then refer to all details within the body contour.
Photographic methods of capture ("mapping") for amateurs see above ("Optical measuring equipment")
Photo-Scan

The above-mentioned method with a guitar body photo under a thread grid above can be simplified by also taking a photo of two perpendicular measuring tapes lying on it. Here too, distortions of the proportions caused by perspective do not disturb with sufficient camera distance.
Contour gauges
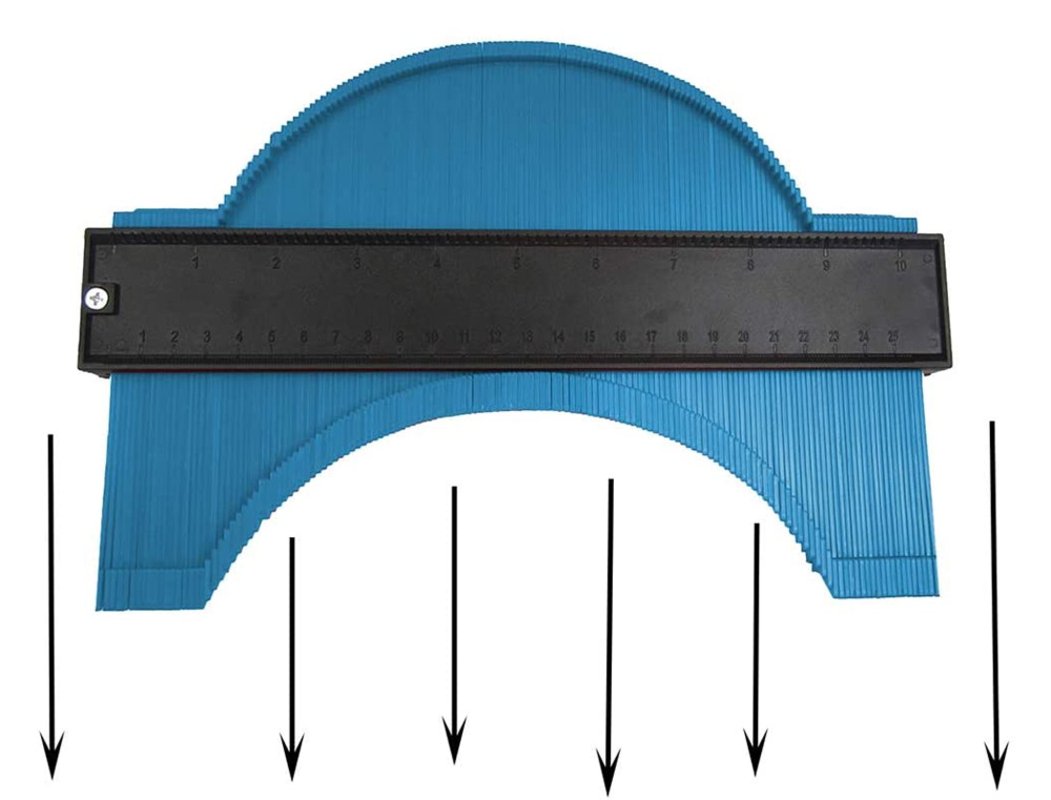
Thanks to this tool, contours can be easily scanned and then transferred.
The transfer of guitar neck profiles with contour gauges only serves as a supplement, since it is problematic to relate these curves to the zero point.
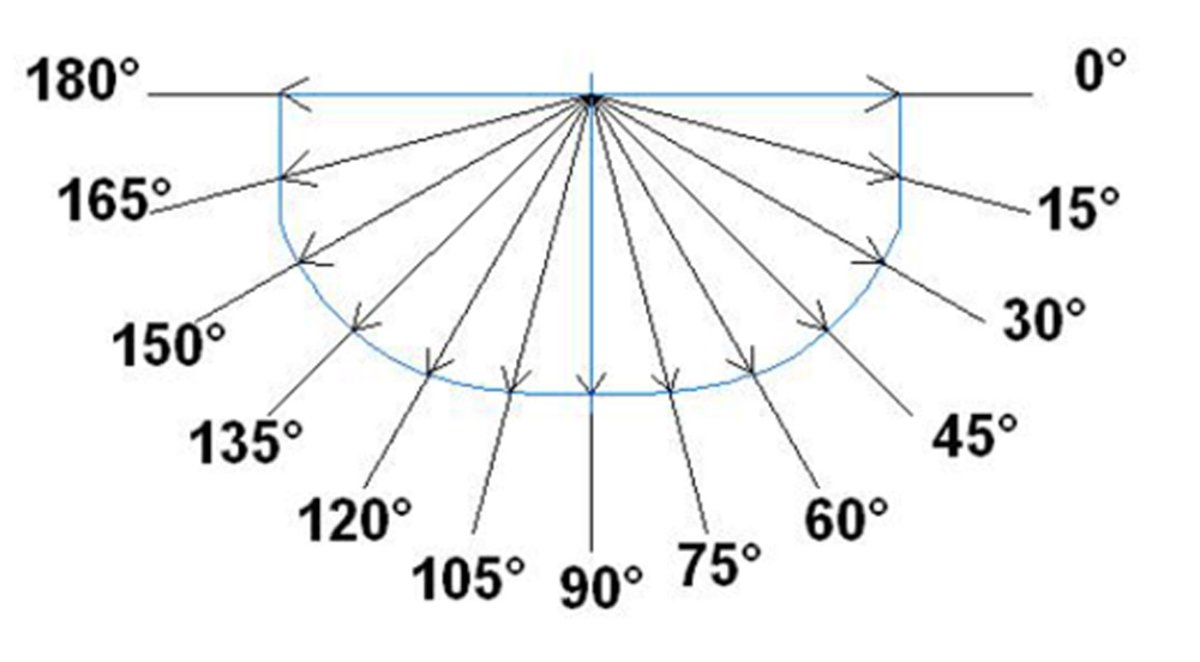
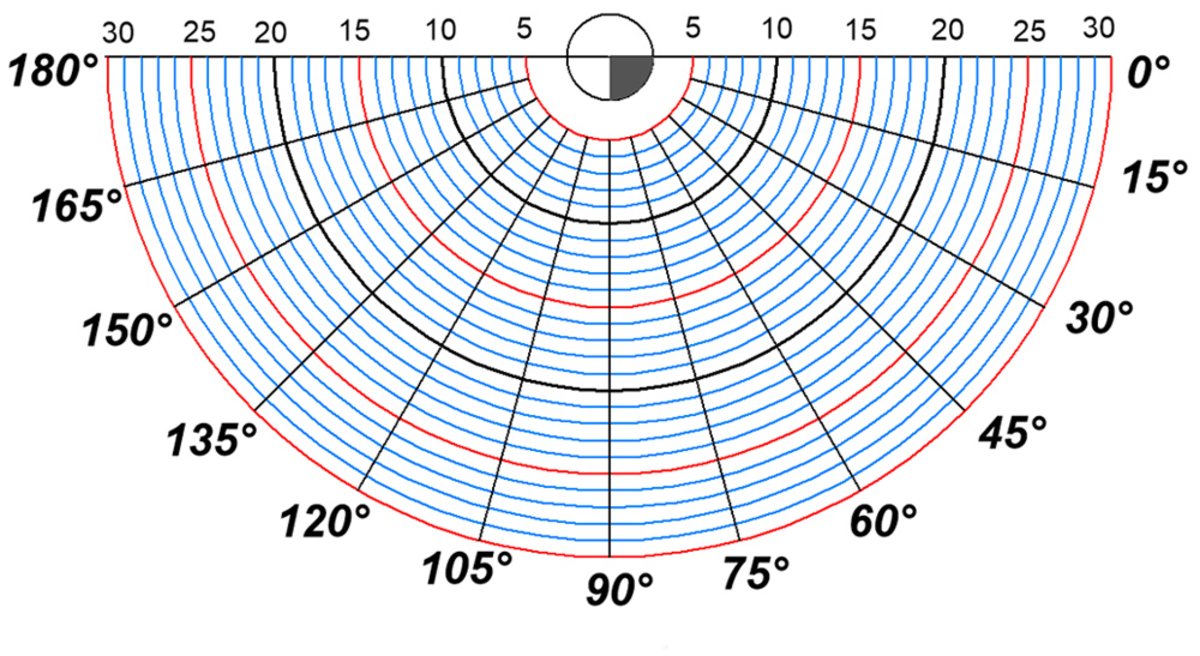
Polar Scanner (DIY)

To describe the spatial coordinate "Z" in order to describe the neck profile in the respective fret position or the neck inclination towards the body, the zero point lies on the center line X = 0 and on the fingerboard surface (flat, without radius, without fret bars).
In order to capture the profile contours, 12 steps at an angle of 15 ° are sufficient. If you want to work more often, you can make a scanning device. This allows profiles of any guitar necks to be stenciled to the polar coordinates.
Neck profile and matrix for measurement
Comments (0)
No comments found!