Neck profiles
The transverse profile of a high-quality guitar neck, even if it has been pre-machined, only gets its definitive shape through human handwork. Two necks are seldom exactly the same and every single instrument feels different. Our sense of touch (haptic perception) examines the neck like a magnifying glass and immediately reports on every small dent, wave, crack, paint damage, burr, etc.
To answer the question "How many different neck profiles are there?" to give, we must draw a reasonable line of accuracy. My suggestion would be to compare all the differences that can still be detected well with 13 measuring points in 15 ° steps with a standard profile. Such a standard does not yet exist, of course, and must first be selected from the many profiles recorded. The matter is further complicated by different neck widths, which require subsequent scaling to the standard width.
Profile scanner

The assignment of the profile types to specific instruments, or their types, manufacturers, musicians, style or time epochs is a very interesting story, but this is about the simple geometrical perspective and construction options.
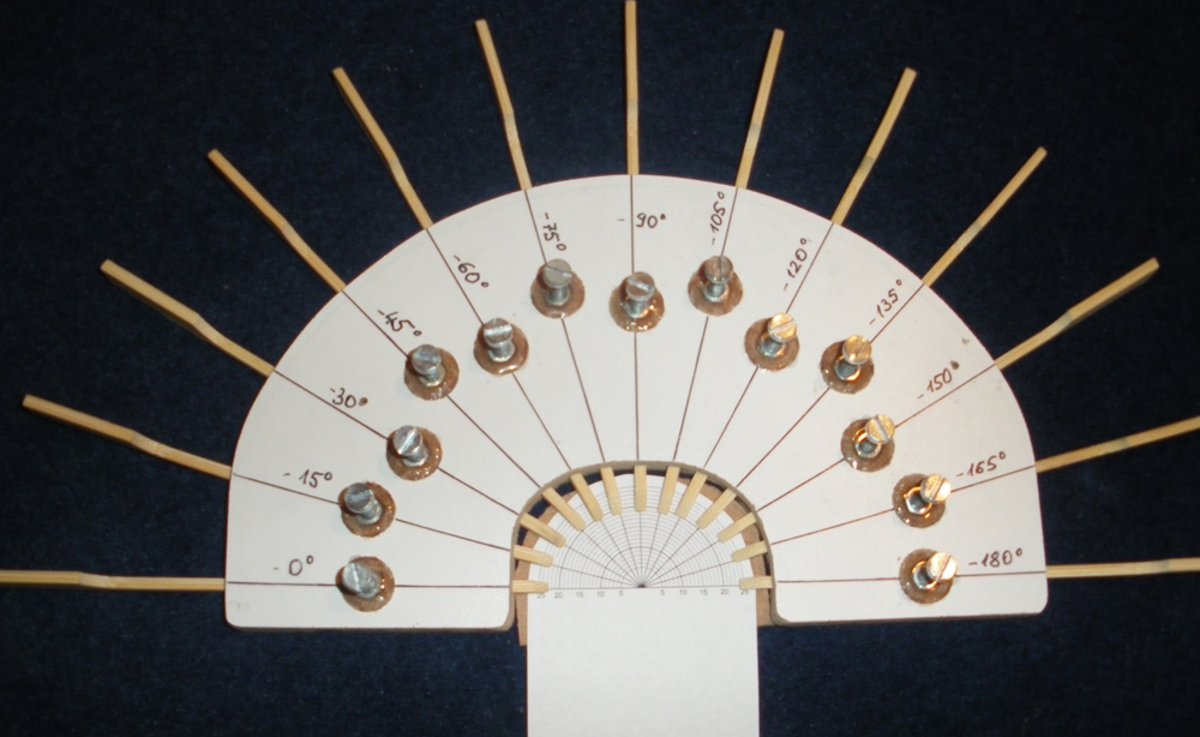
As an aid, we need a precise scanning device that delivers the measured values in the polar coordinate grid quickly and precisely. Before I look for a digital, laser-controlled etc. Should be looking for a device, I made an "analog" prototype:
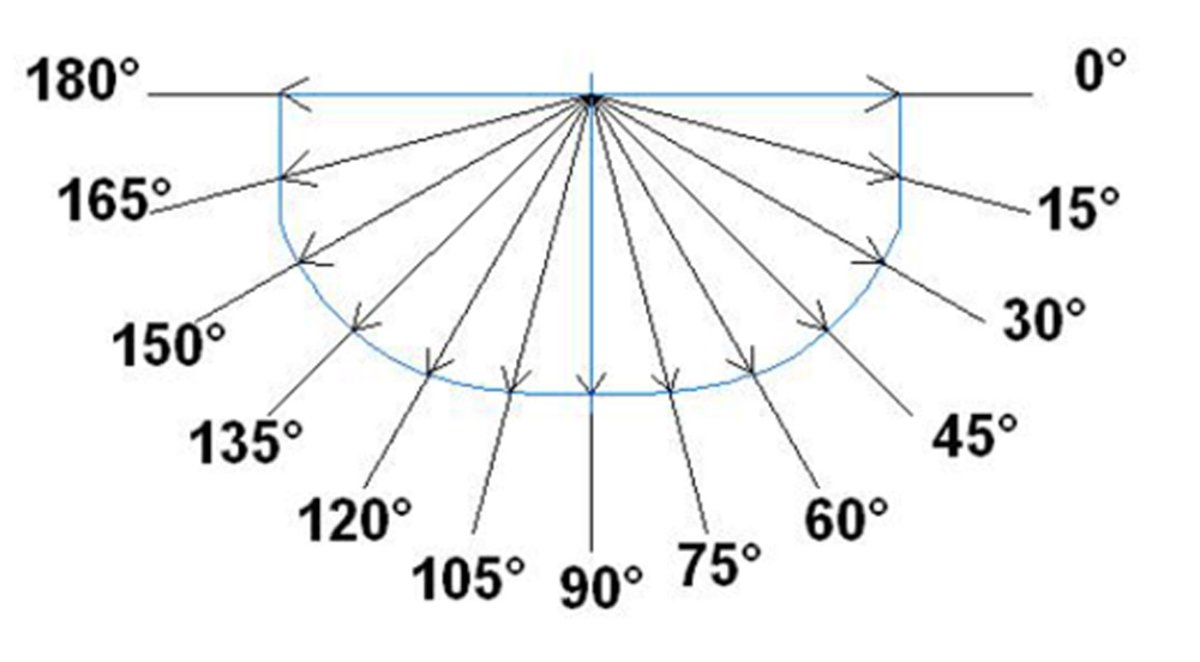
The neck profile scanning is made possible by 13 easily movable square bamboo needles in a guide plate with locking screws. The whole thing is attached to the neck with a pair of pliers and the middle needle (90 °) aligned with the center of the neck profile. Then the two outer needles (0 ° and 180 °) are aligned with the fingerboard edges, whereby the middle needle also needs to be readjusted if necessary. Then all the remaining needles are pushed onto the neck and locked in place. The device is carefully removed and is ready to read the profile coordinates.
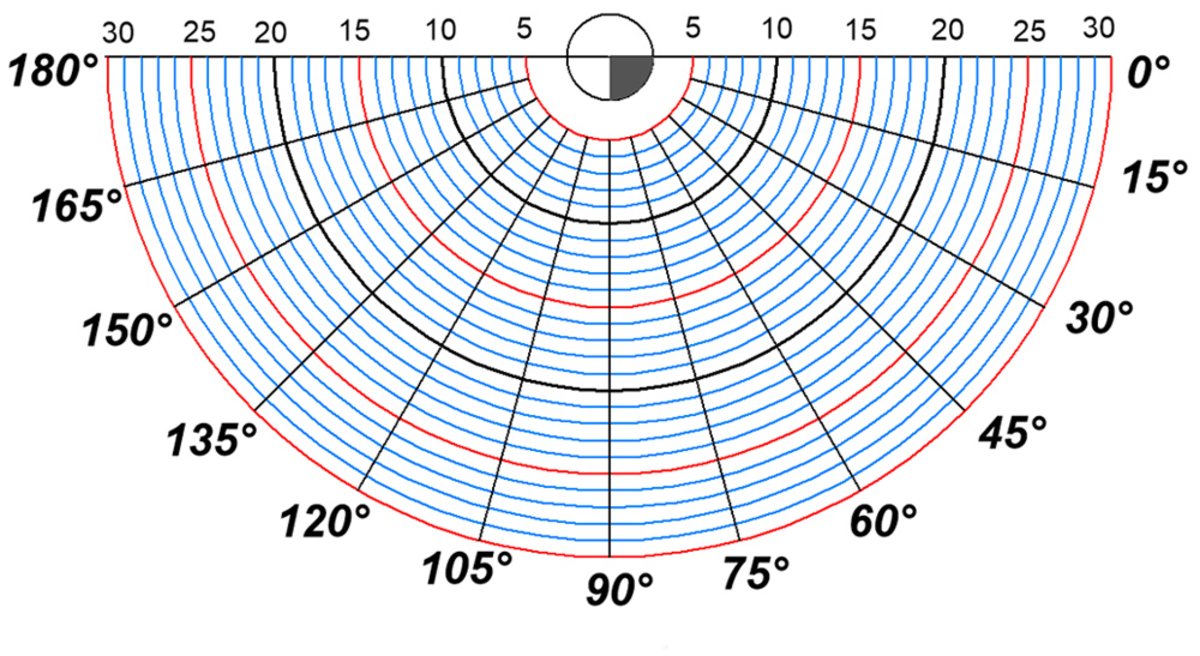
The matrix --- Now we need a matrix drawn in polar coordinates with 13 individual scales divided into millimeters. We place the device on this matrix in such a way that the 180 °, 90 ° and 0 ° needles point to the center.
Reading --- A good magnifying glass is required to read the coordinate values so that the accuracy can be achieved to within a few tenths of a millimeter.
Of course, you can always mark the needle positions directly on cardboard or suitable template material and use a curve ruler to create a fixed profile template.
Comments (0)
No comments found!